Grow Beds that Last: Premium Raised Bed Planting Systems for the Modern Gardener
There are many different types of raised planting beds to choose from when planning your garden, but here are two
There are many different types of raised planting beds to choose from when planning your garden, but here are two
Aquaponics is a sustainable and efficient method of gardening that combines aquaculture and hydroponics. In this system, nutrient-rich water from

Red clay kiln-dried brick pavers shaped the earliest Texas streets. We traverse this picturesque brickwork in historic districts across the Lone Star State, where well-built

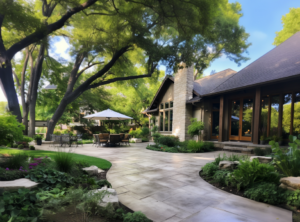
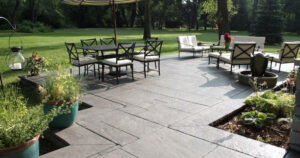
Intro Is your plain gray patio cramping your style? It’s time to break free from the ordinary. With a touch of staining, your patio can

Subscribe to the Texas heritage home and ranch newsletter.
Red clay kiln-dried brick pavers shaped the earliest Texas streets. We traverse this picturesque brickwork in historic districts across the Lone Star State, where well-built

The “Hearth” of Outdoor Living: Cooking, Gathering, and Connecting with Nature An outdoor kitchen isn’t just an extension of your home—it’s an invitation to step

Steel Landscape Borders: A DIY Guide to Purchase and Installation Steel landscape borders are a sleek, durable, and modern way to define garden beds, pathways,
Aquaponics is a sustainable and efficient method of gardening that combines aquaculture and hydroponics. In this system, nutrient-rich water from a fish tank is used
Welcome to the lush world of aquaponics, where innovation meets nature’s beauty! Are you looking for a way to make your pond or water feature
Accent stain Ammonia levels aquaponics Aquaponics fish species Aquaponics system Aquaponics tips and tricks Cedar deck composite decking concrete overlay countertop concrete overlay near me concrete overlay patio concrete overlay products Concrete Overlays deck buying guide deck design deck materials deck pricing DIY deck Efficient aquaponics setup Exterior aesthetics Fish and plant ecosystem gardening Gardening Tips Home Improvement Landscape Design Outdoor Flooring Outdoor Living outdoor renovation outdoor spaces overlay concrete overlay concrete steps with pavers Patio design Patio Renovation Patio transformation pH adjustment products pH balance Pond and grow bed setup Single pump aquaponics Stamped concrete stamped concrete overlay Surface Finishing Surface Preparation sustainable gardening tf structural concrete overlay Treated Pine deck
Building outdoor living spaces in Central Texas since 2015.
We look forward to helping with your project!
Grow was founded in 2015 and specializes in the design-build of outdoor living spaces.
We are active gardeners and home improvement enthusiasts.

Introduction Aquaponics is a sustainable and eco-friendly method of growing plants and raising fish together in a symbiotic environment. The main component of a successful
A pool deck will enhance both the appearance and functionality of your above ground pool. Follow the steps below to calculate the retail cost of