Intro
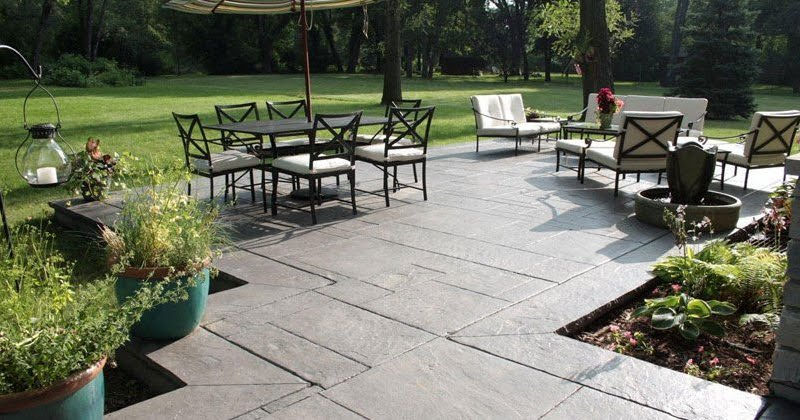
Are you tired of your patio looking weathered after years of use? Restoring its charm is simpler than you might think. While concrete surfaces are durable, they’re not immune to the effects of time. Cracks, fading colors, and general wear can diminish the once-lovely appearance of your patio. Concrete overlays offer a practical and creative solution. They can refresh and rejuvenate your outdoor space by restoring worn-out surfaces.
This guide will lead you through the step-by-step process of successfully choosing the right overlay. We discuss crucial techniques regarding surface preparation, overlay types and finishing, empowering homeowners to make a well-informed purchasing decision. We’ll start by introducing four (4) important tools for surface preparation. Next we’ll explore three (3) types of concrete overlays: self-leveling, broom finish, and stamped overlays. Finally we’ll describe three (3) surface finishing techniques that can be used separately or together.
Get ready to bring new life to your patio with concrete overlays!
Concrete Surface Preparation for Applying Overlays
Proper surface preparation is critical for creating a durable and long-lasting bond between the new overlay above and the underlying concrete surface. The four (4) key tools for achieving this bond are crack repair, steel reinforcement, scabbling, and power washing. While not all steps are required for every project, we’ll guide you through the specifics of each, helping you determine which ones to incorporate into your own work.
Crack Repair
Crack repair uses an epoxy injection technique. Used mostly for repairing hairline cracks, it prevents previous fractures from reappearing in the new overlay. The service is typically charged per linear foot of crack repair needed. The technician will use a grinder to open hairline cracks to a consistent width and depth, then apply an epoxy/ sand combo to bond the two sides together. After application, there is often a raised ridge along the old fracture which must be ground flush with the surface before applying overlay.
Steel Reinforcement
Steel reinforcement is a technique reserved for larger cracks, separations or uneven surfaces which may still be settling and prone to shift. The service is typically charged per linear foot of fault repair needed. The procedure for steel reinforcement involves cutting trapezoidal recesses along each side of a compromised fault. Steel rebar is inserted with the ends either hooked or using concrete anchors on each side of the fault. After the steel is secure the recess is then filled with high strength concrete to prevent future cracks.
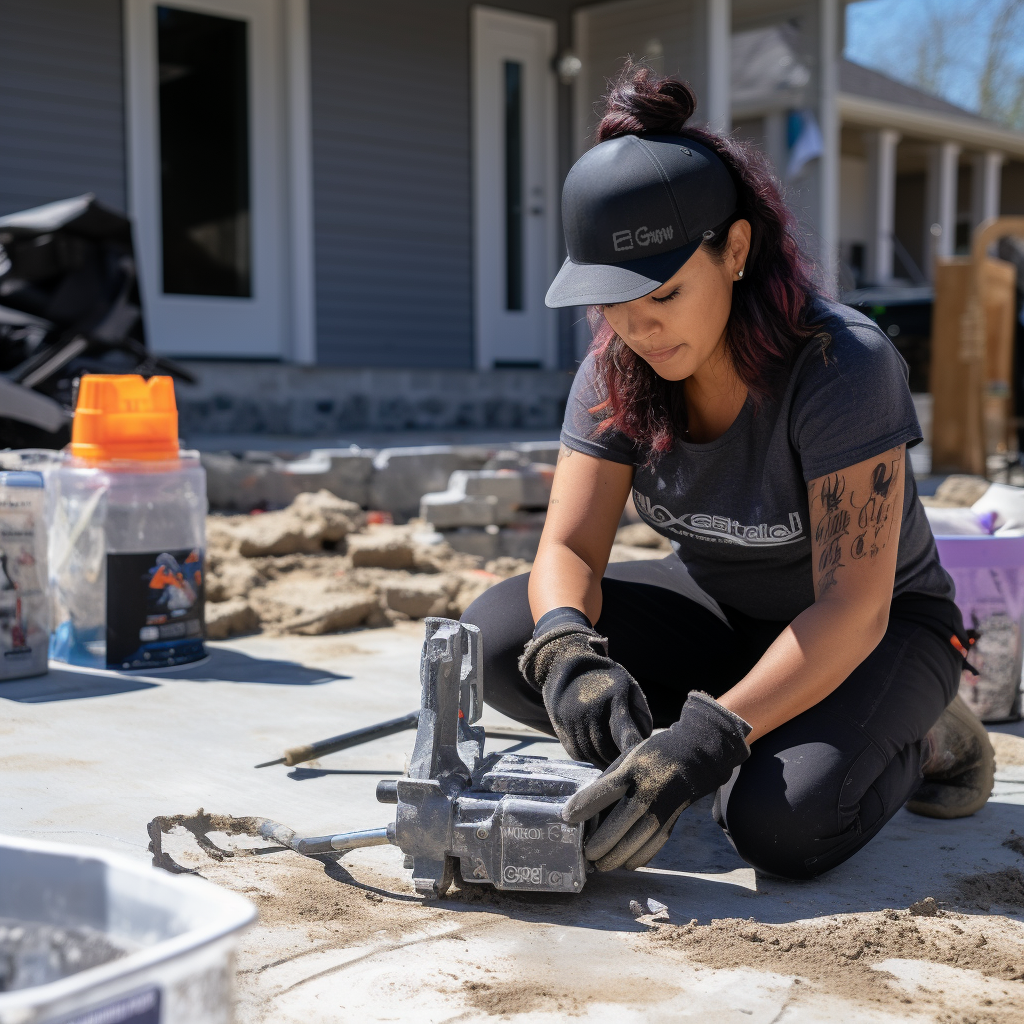
Scabbler Grinder
Concrete grinding uses a floor standing unit similar in appearance to a polisher known as a “scabbler”. The service is typically charged per square foot. Scabbling or surface grinding is necessary both to level uneven surfaces and to produce the proper texture for bonding with the overlay. Scabbling works well to remove old finishes like plaster coatings, acrylic polymers, epoxies or even painted surfaces. It is sometimes also necessary to level the surface after crack repair or steel reinforcement procedure.
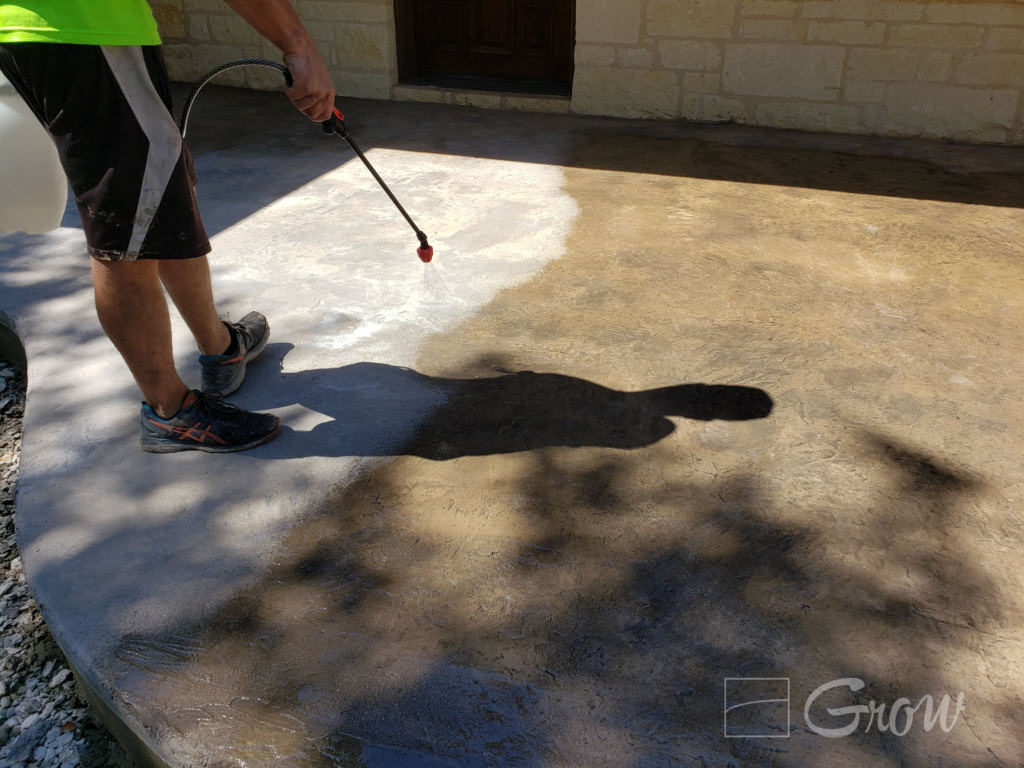
Power Washing
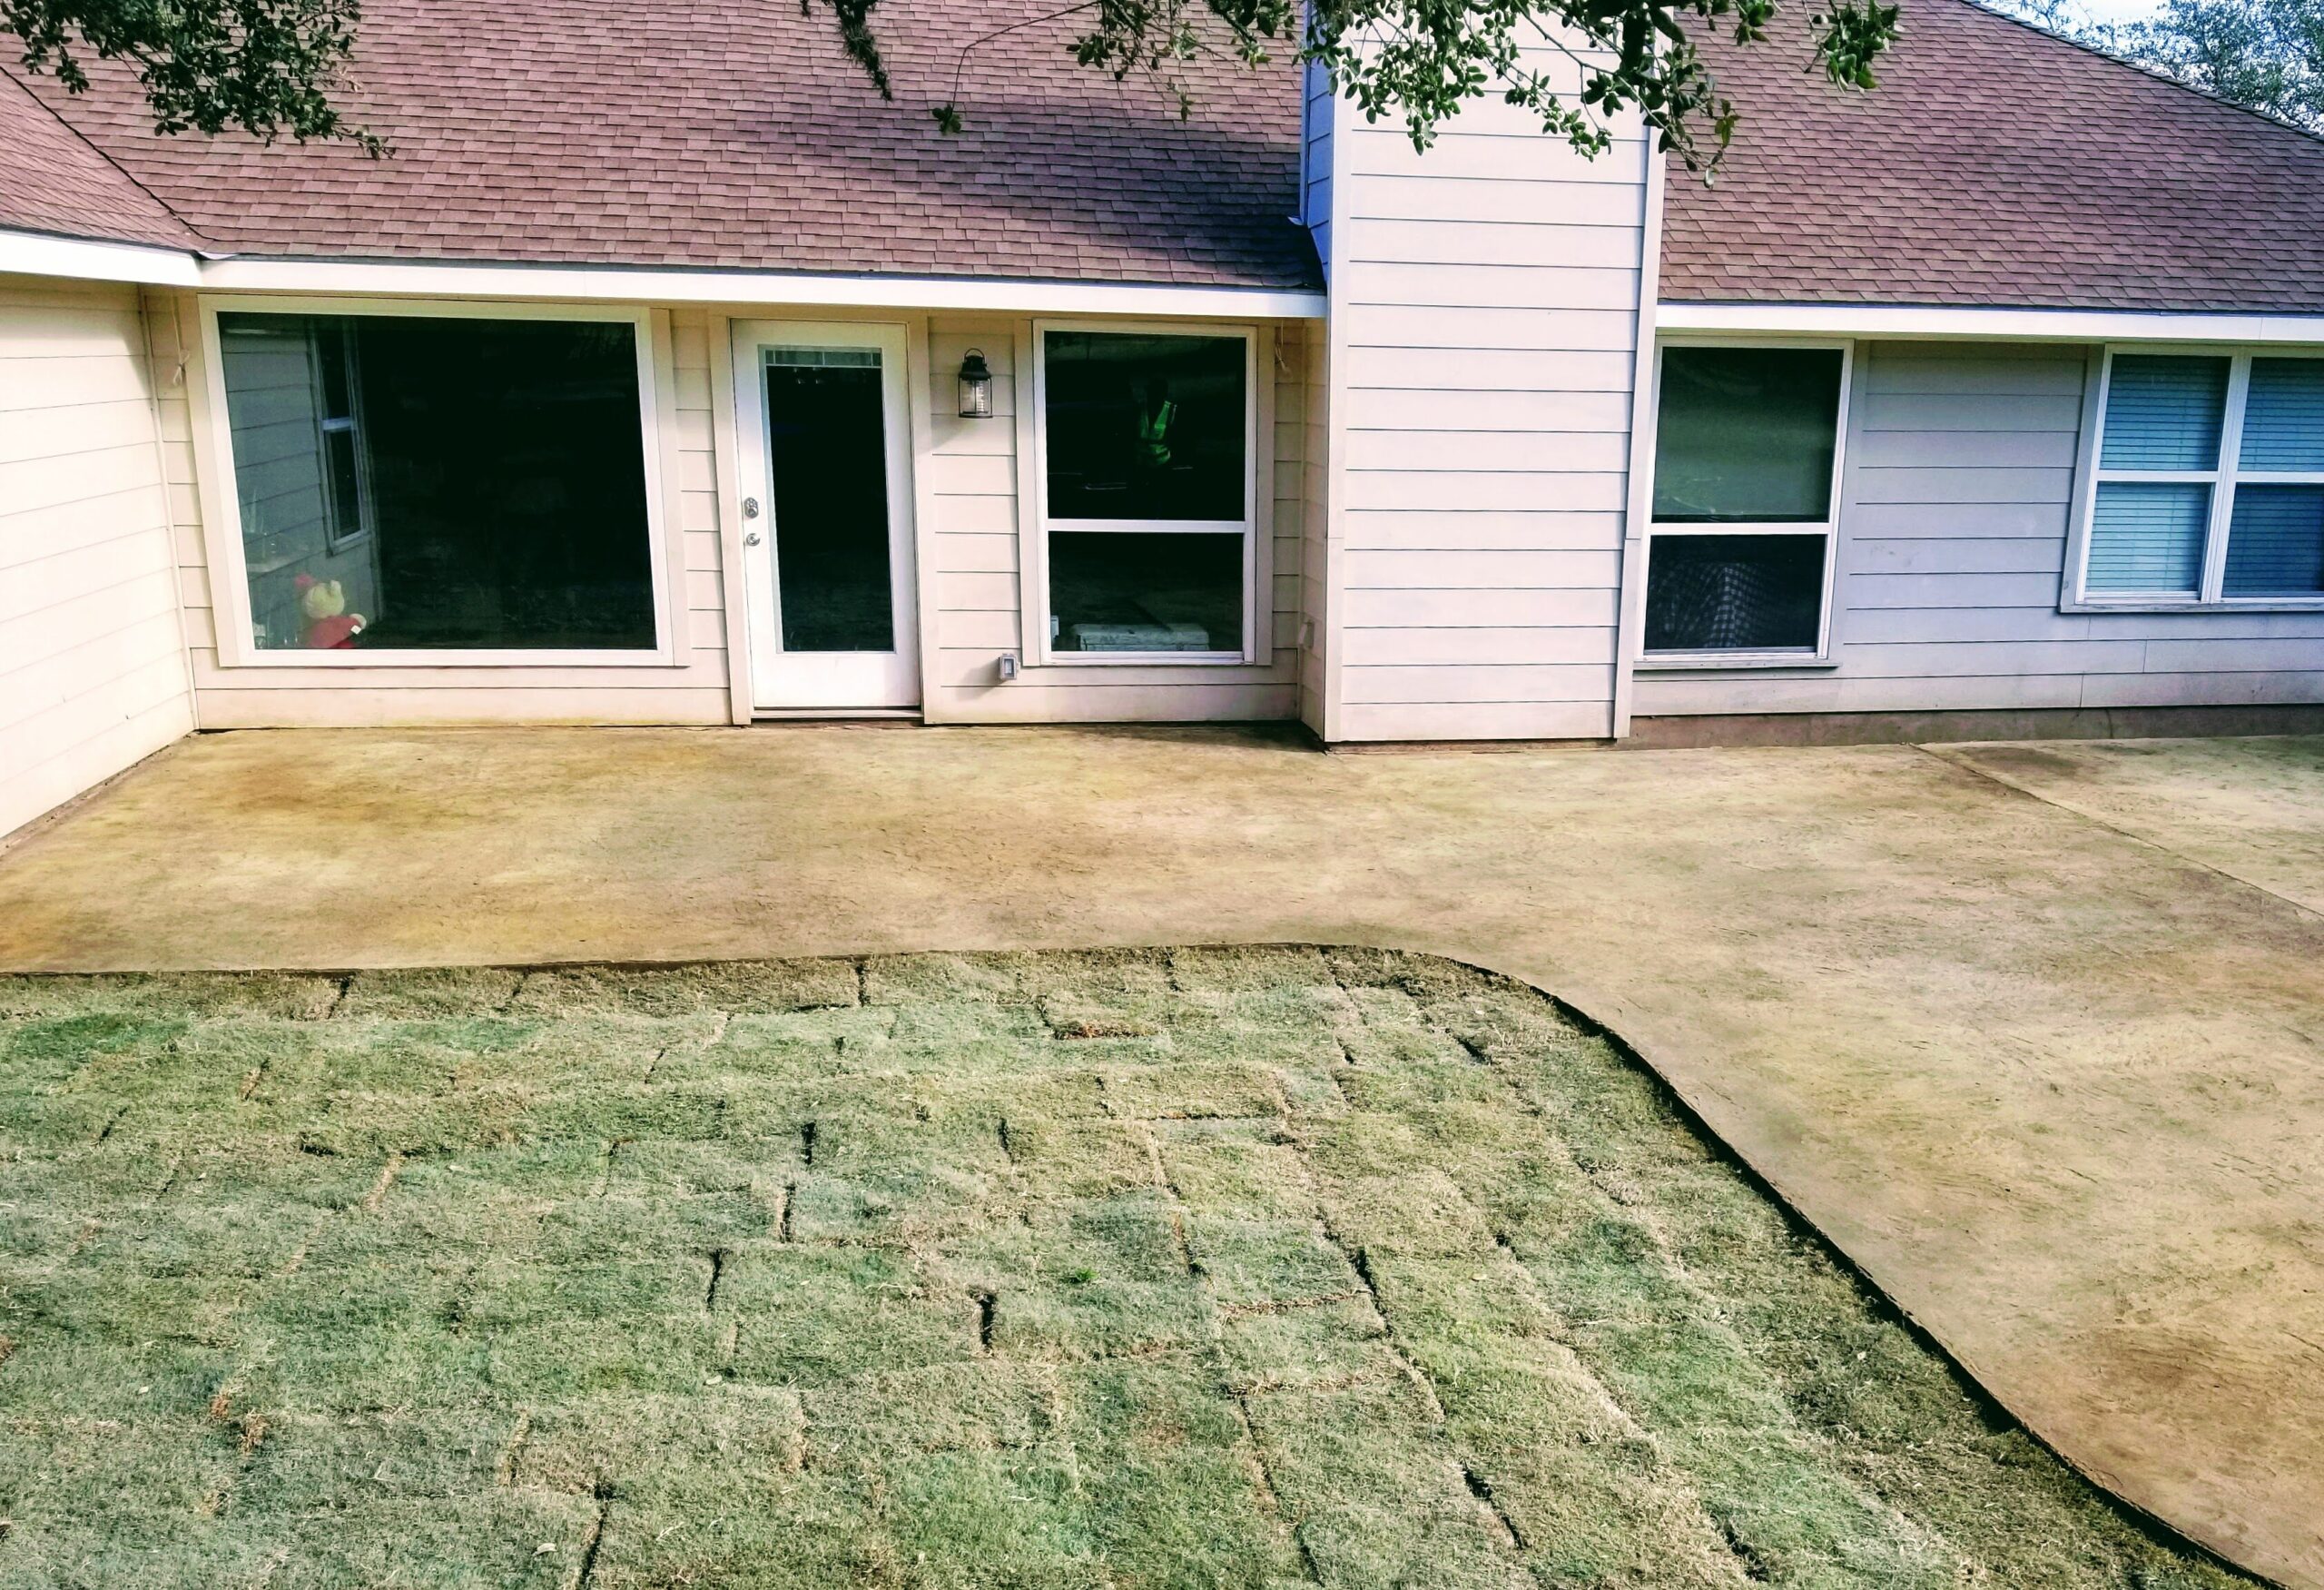
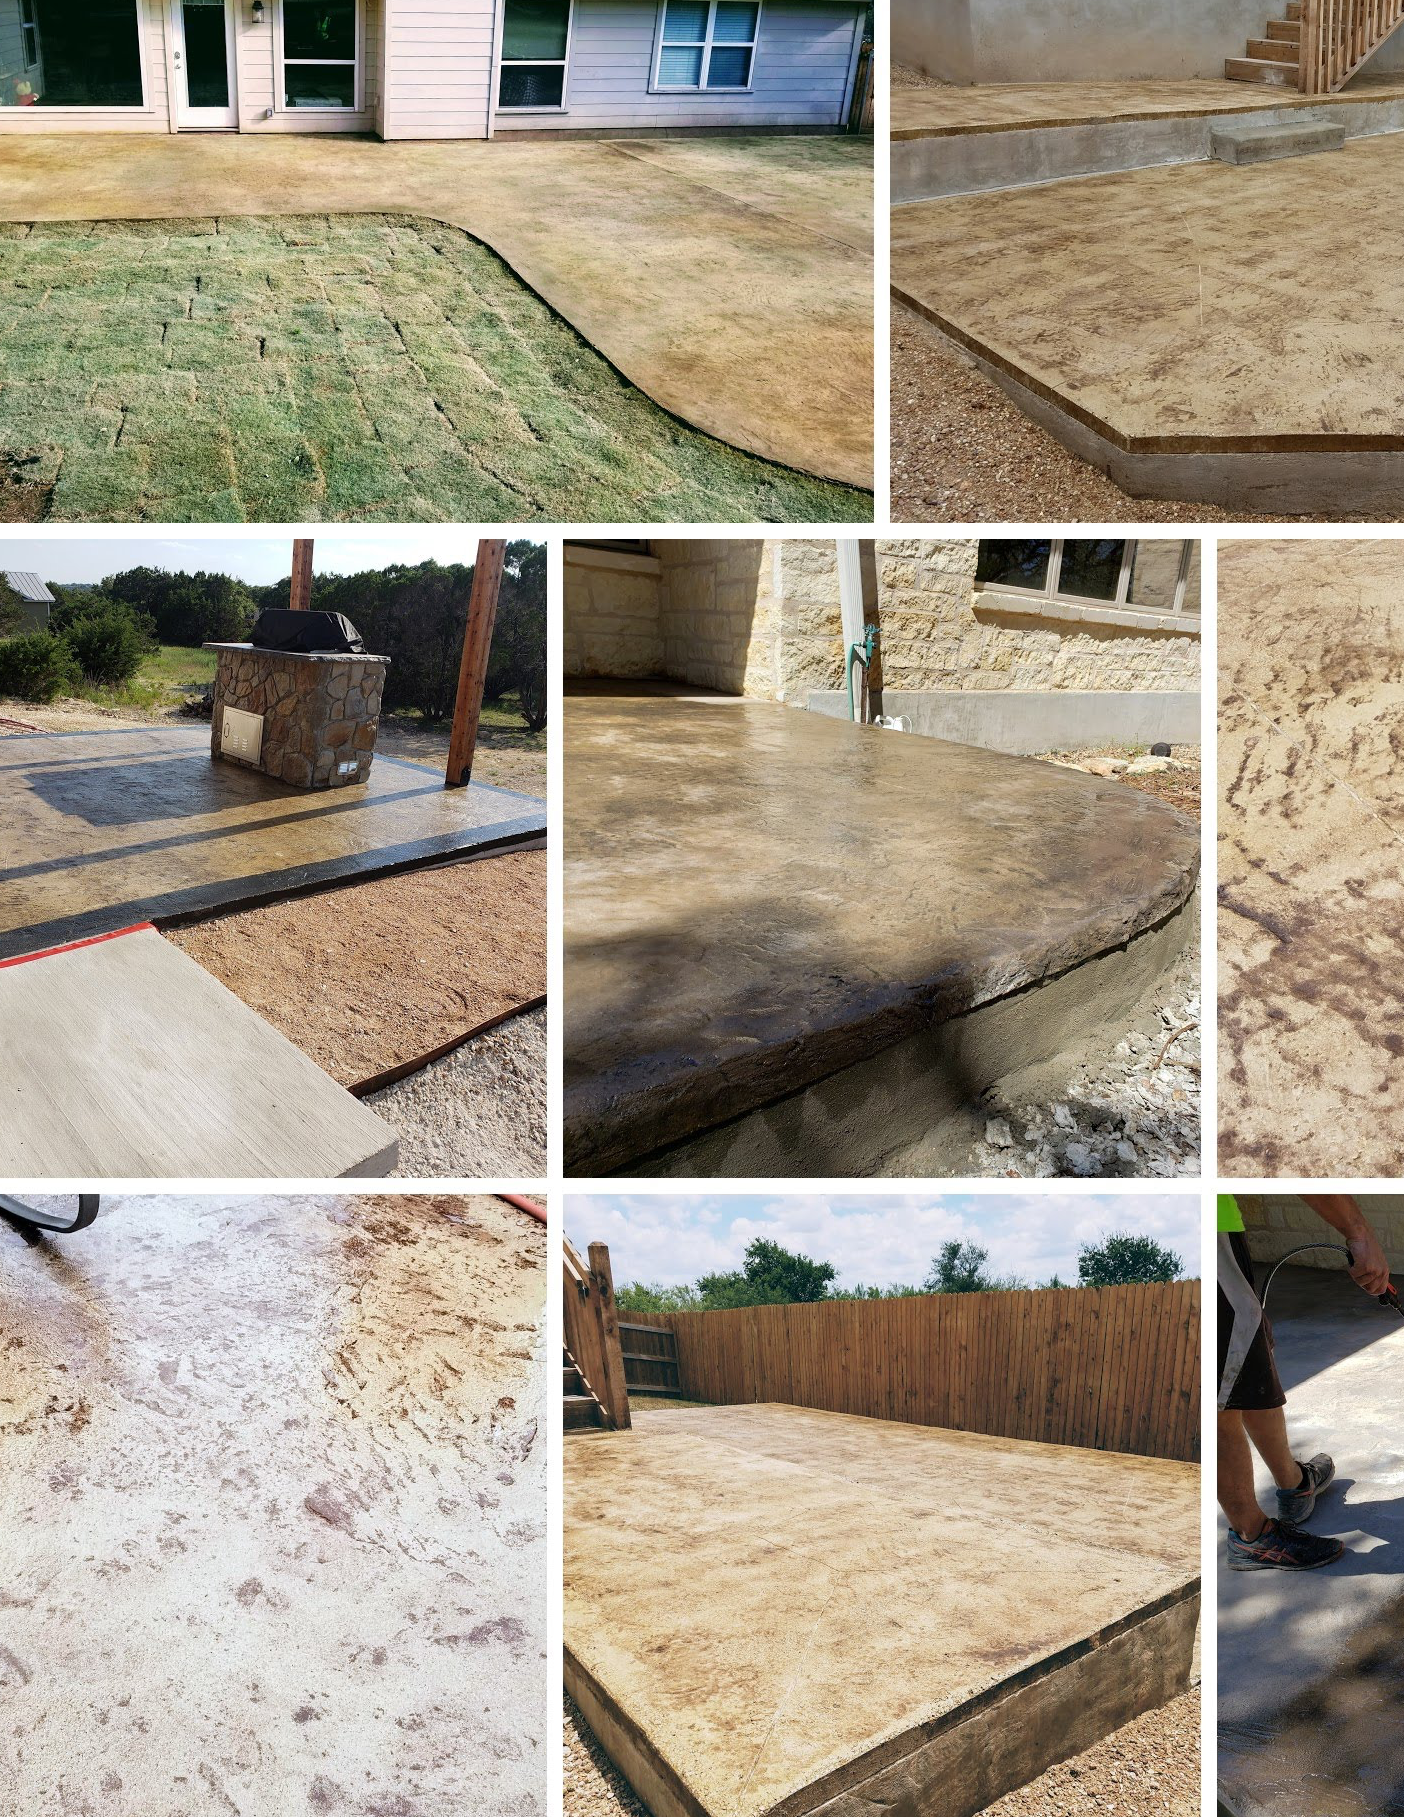
Power washing with soap is almost always necessary as it removes dirt, debris, contaminants, oil and chemicals which can disrupt bonding. This service is typically charged per square foot or per day. The surface will be thoroughly cleaned, often with multiple passes. After power washing the surface will need to dry for a day in full sun before applying the overlay.
Types of Concrete Overlay and their Application
The three (3) types of concrete overlays that we recommend are self-leveling, broom finish and stamped overlays. All three are masonry-based products that use portland cement as the key ingredient. More specifically however, they are GFRC products which stands for glass-fiber-reinforced-concrete. The ingredients vary but usually include portland cement, silica sand, glass microfiber, acrylic polymer, pozzolan, superplasticizer and of course water. In order to give the mix a specific color an integral color may be included, however with overlays we recommend using liquid-based pigments (instead of powder-based pigments which are common integral color solutions for traditional or stamped concrete).
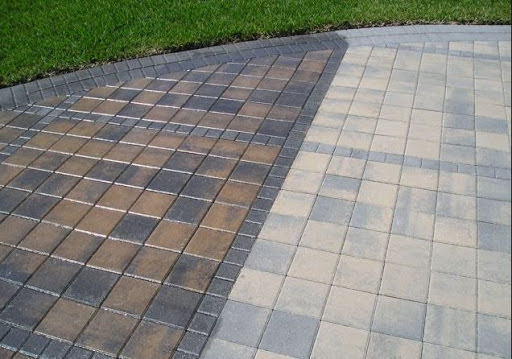
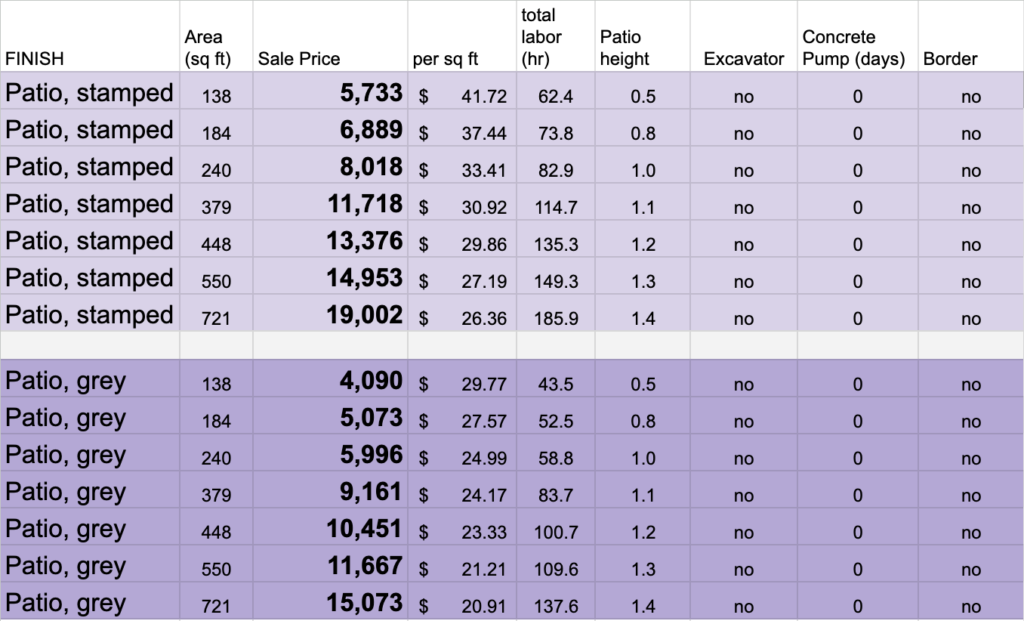
The application of concrete overlays is typically priced per square foot. If you are interested in reproducing a smooth concrete finish choose a self-leveling overlay. If you prefer a light texture for safety then choose a broom finish overlay. If you want to create a luxury finish that looks like flagstone, tile, pavers or even wood then choose a stampable overlay.
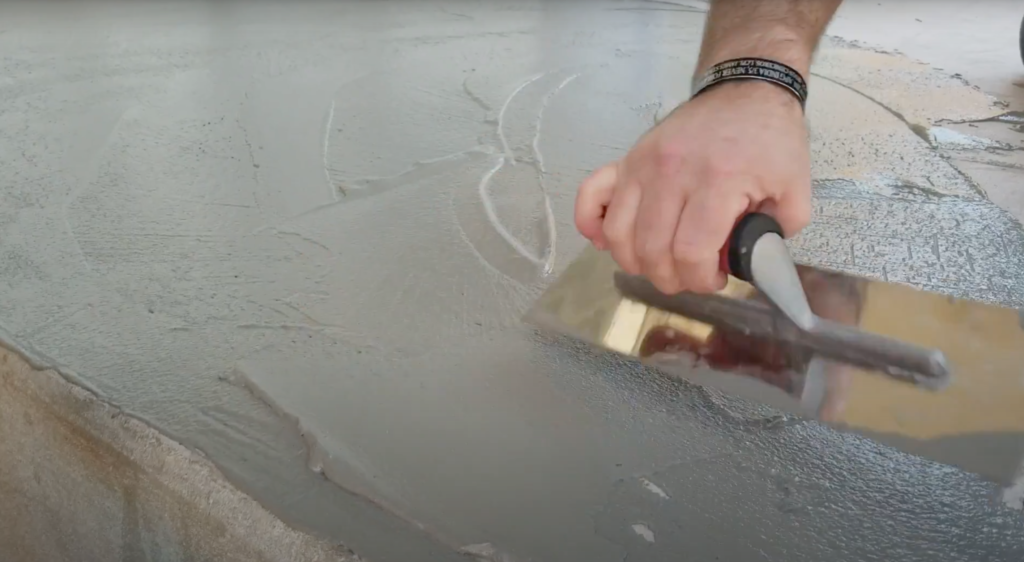
Self-Leveling Overlay
The first step to install a self-leveling overlay is to apply the primer to the prepared surface. The primer aids in bonding but it also performs another important step. Because the self-leveling overlay surface is smooth it is the most likely of the three overlays to show imperfections. The primer arrests air bubbles trapped in the pores of the concrete. Without primer the air bubbles have a tendency to rise to the surface of the overlay as it cures. The result would be thousands of tiny pin-holes throughout your finished surface. For this reason we advise to never skip the primer.
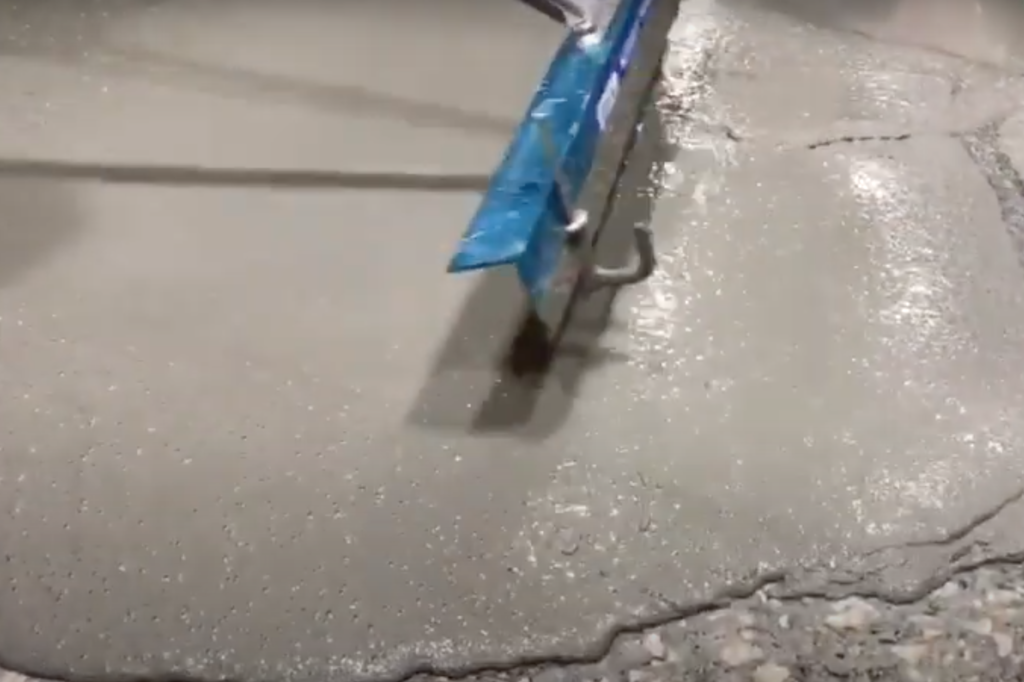
The self-level mix is usually a pre-packaged dry powder requiring only water and liquid integral color. The overlay is mixed in a 5-gallon pail with a paddle mixer for small applications or a masonry hopper for larger applications. The liquified mix will have the consistency of pancake batter when it’s ready to be applied. The technician will use a gauge rake in order to make sure the thickness is consistent as it is applied, usually about 1/4 inch thick.
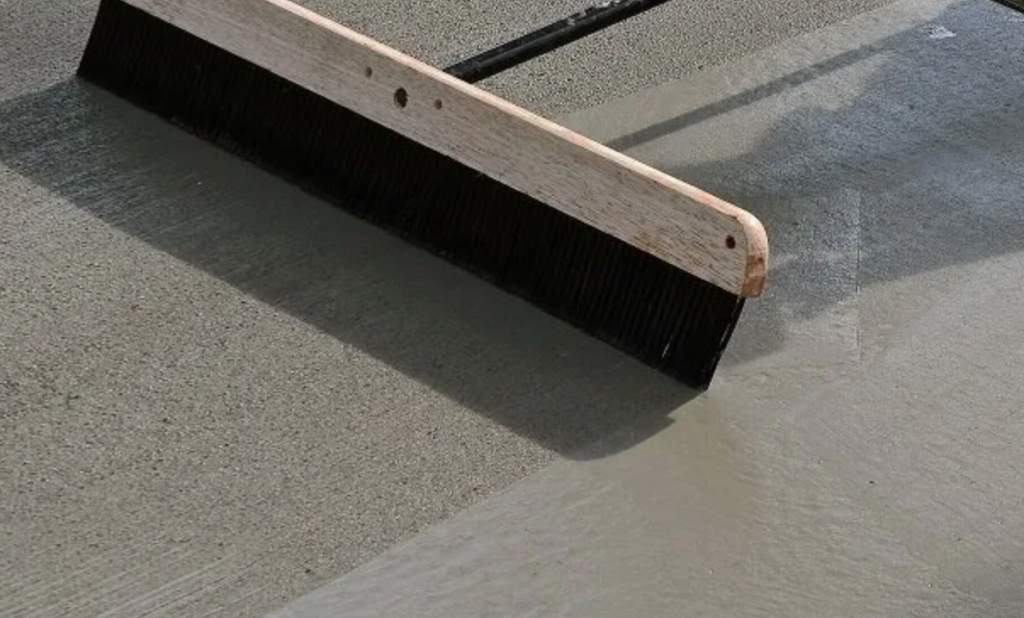
Broom Finish Overlay
For surfaces that require enhanced slip resistance, the broom finish overlay is an excellent choice. Begin by applying primer. Just as with the self-leveling overlay, the primer is a crucial step in order to prevent pinholes resulting from rising air bubbles when drying.
The broom-finish mix is also a pre-packaged dry powder requiring only water and liquid integral color. The overlay is mixed in a 5-gallon pail with a paddle mixer for small applications or a masonry hopper for larger applications. The liquified mix will have the consistency of pancake batter when it’s ready to be applied.

Instead of a gauge rake, the technician will use a simple trowel to apply a thin layer of the mixture quickly over the surface of the patio, usually about 1/8 inch thick. Small inconsistencies or ridges do not matter, as a masonry broom will pull all of this smooth within minutes of applying the overlay.
Usually only a single broom pass is necessary to get a beautifully textured finish, but the broom must be rinsed and shaken dry between each pass to prevent clumping. Light clumping is normal in the broom finish process as it will simply break off when dry leaving a clean broom-finish.
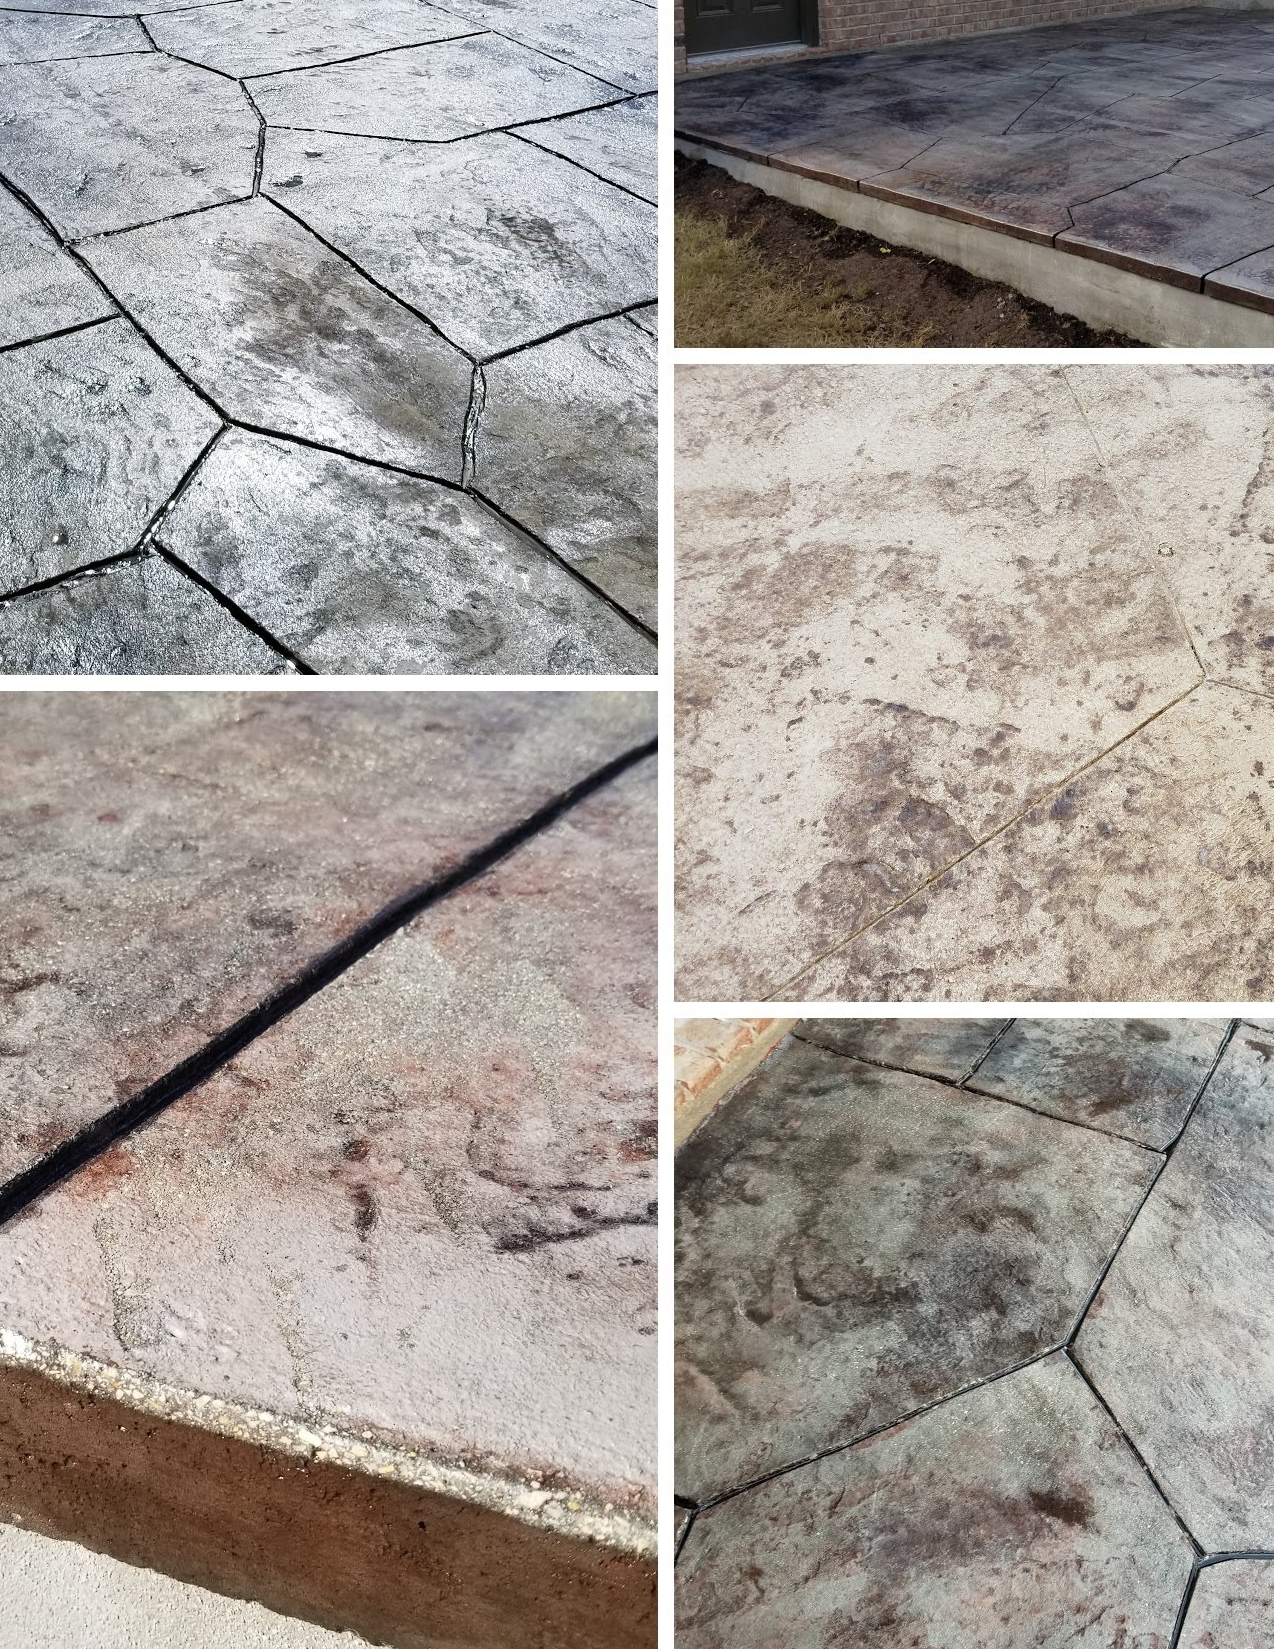
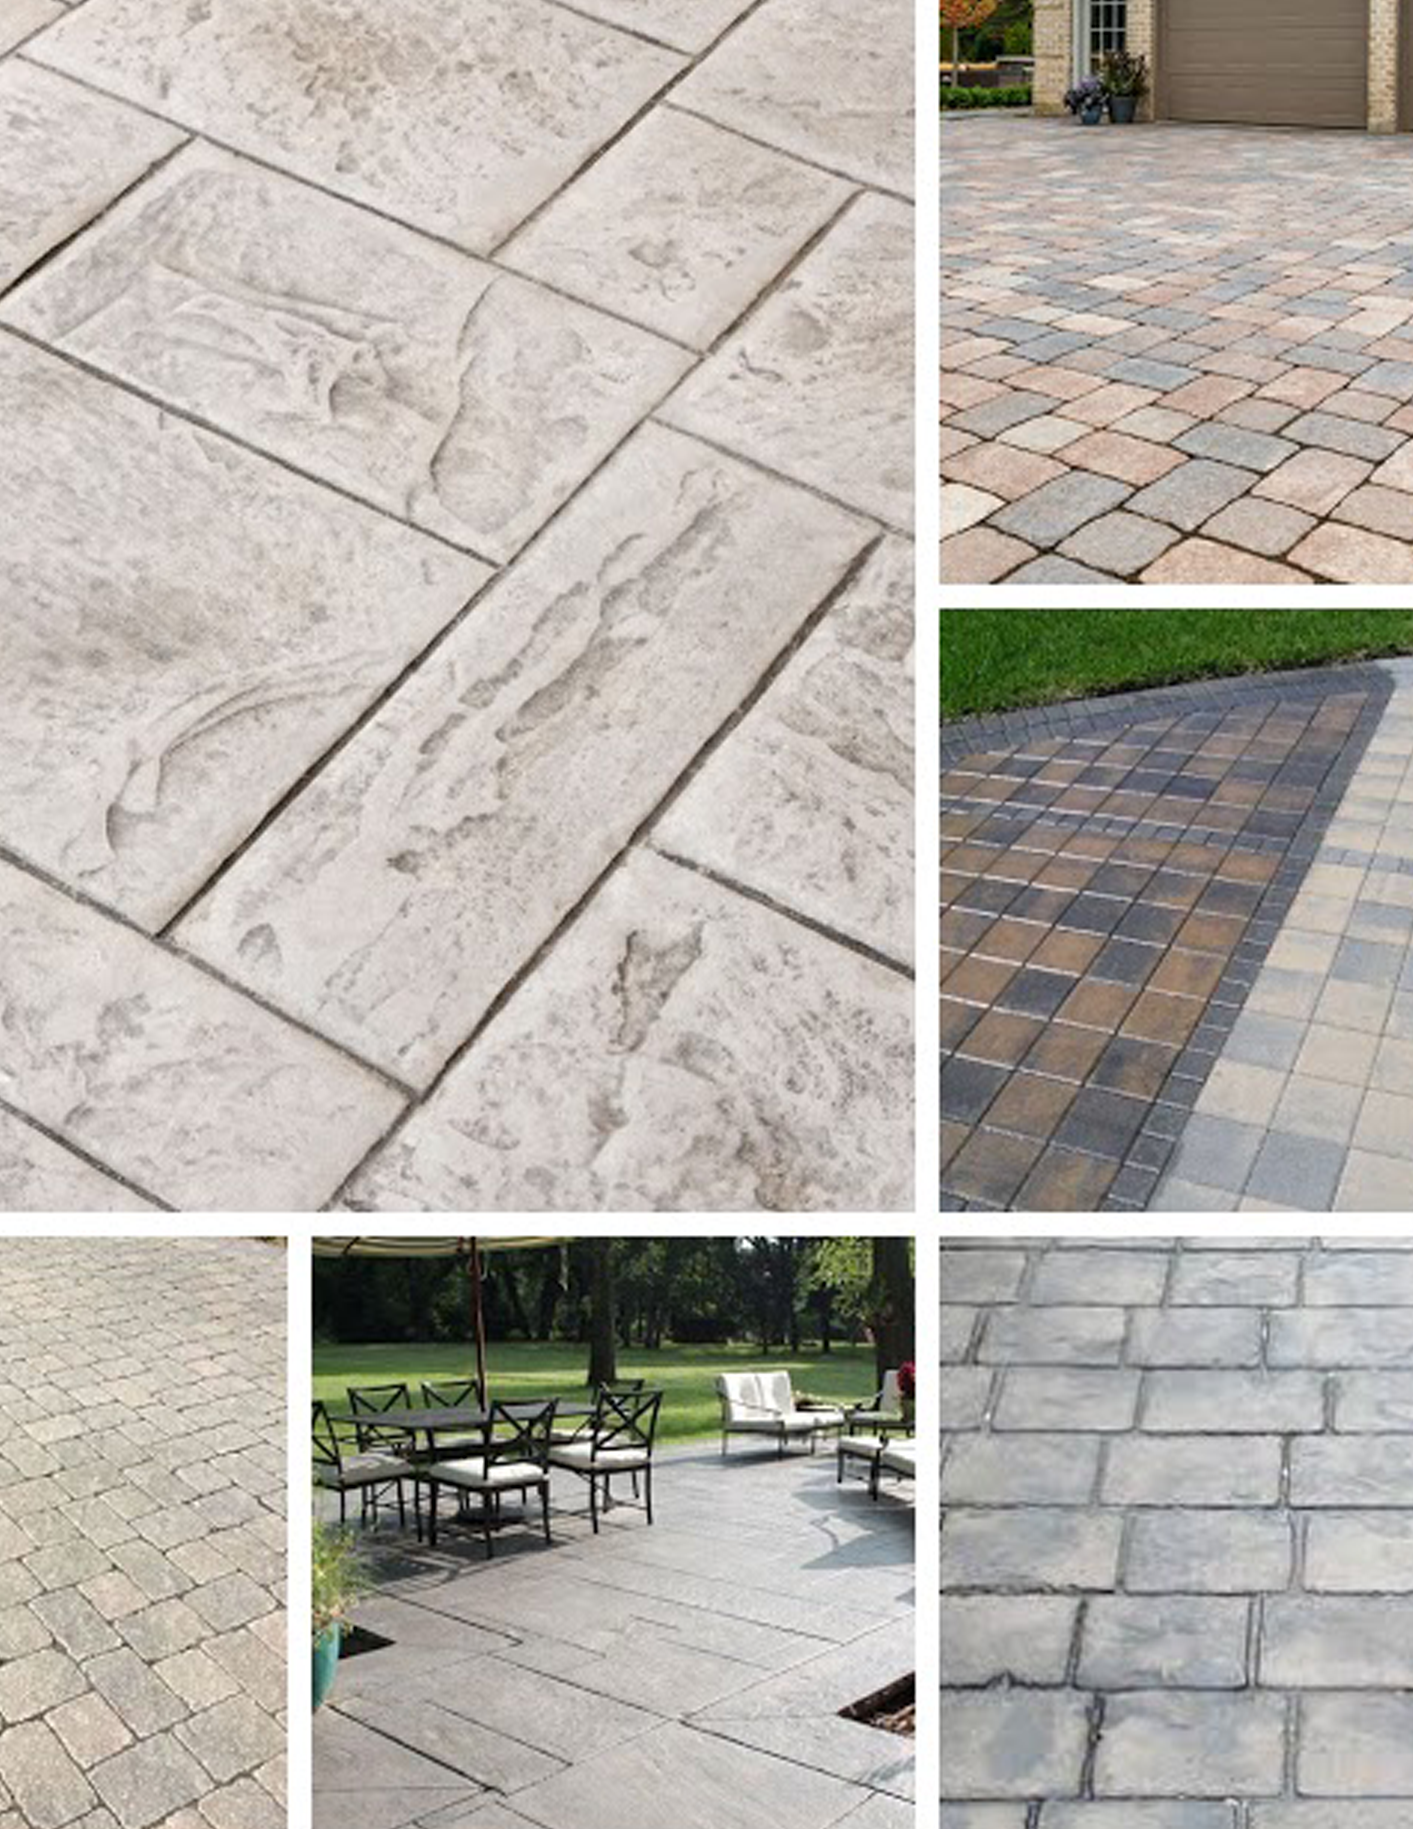
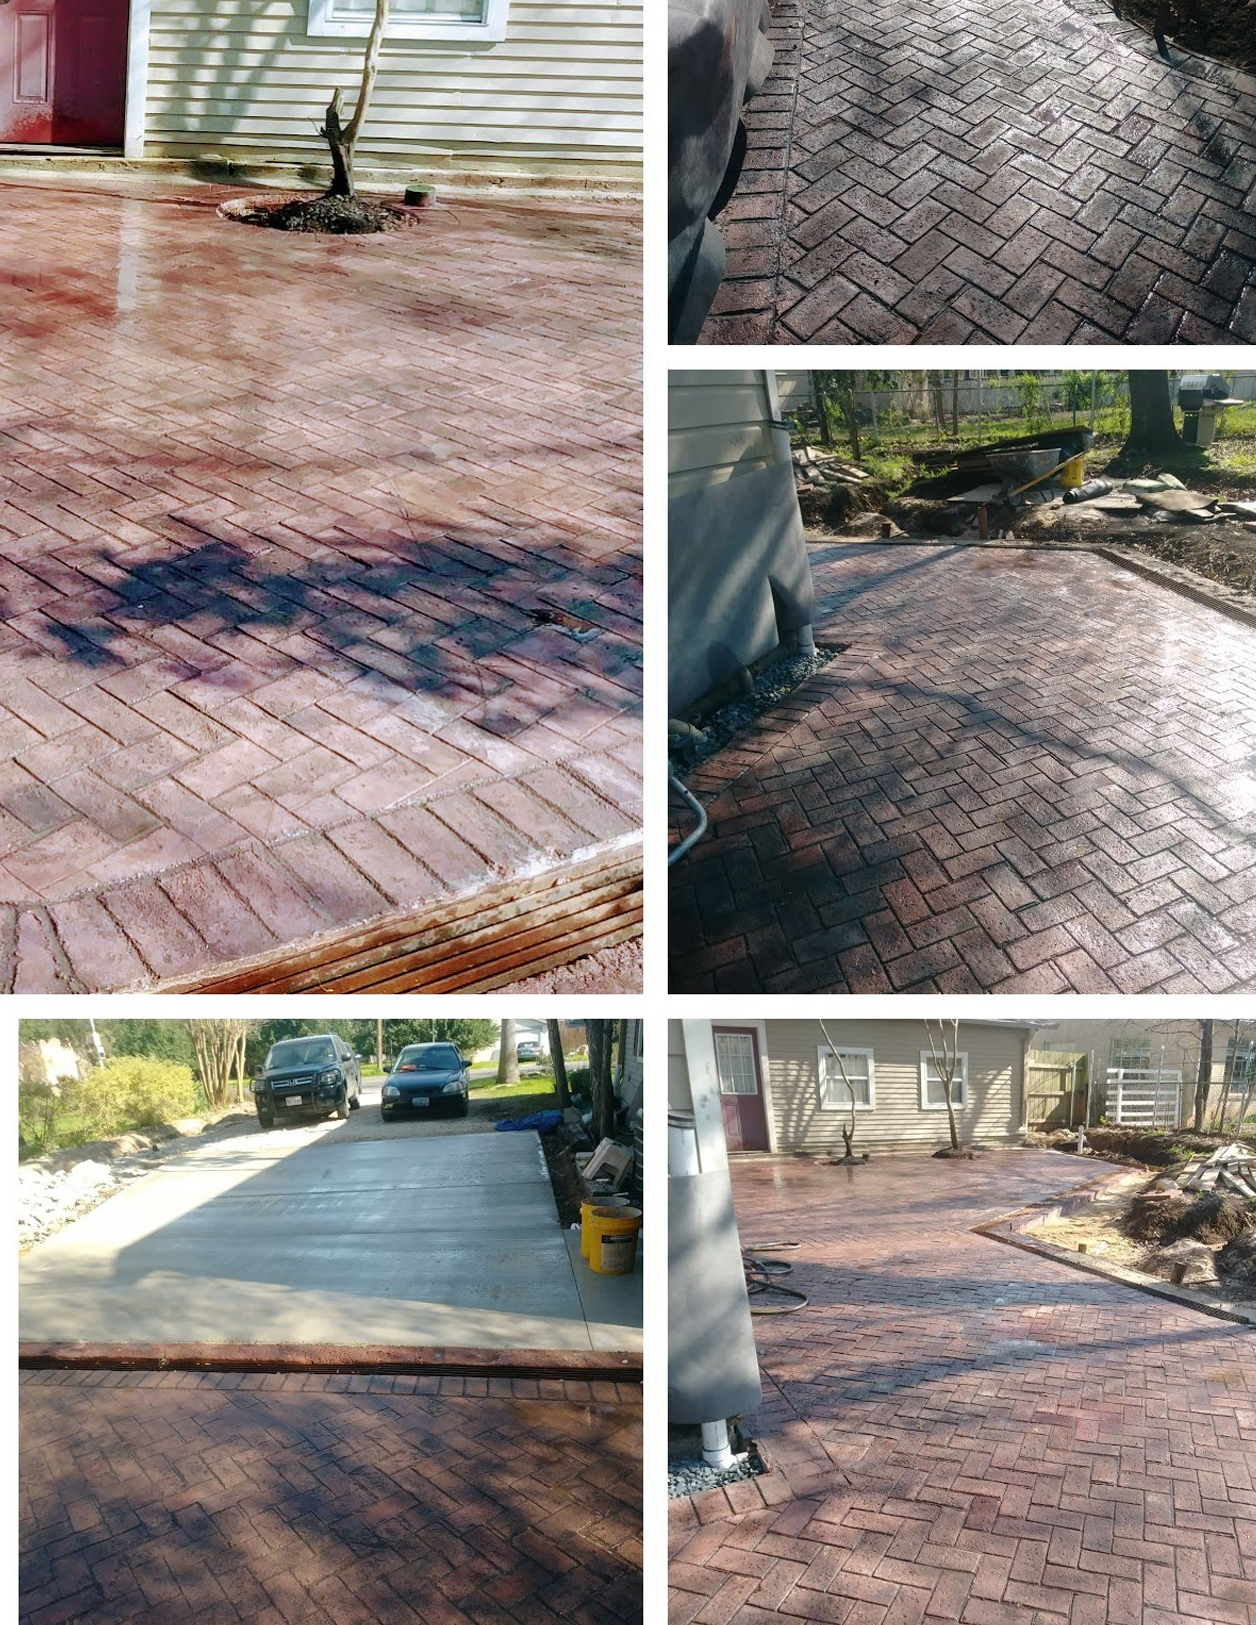
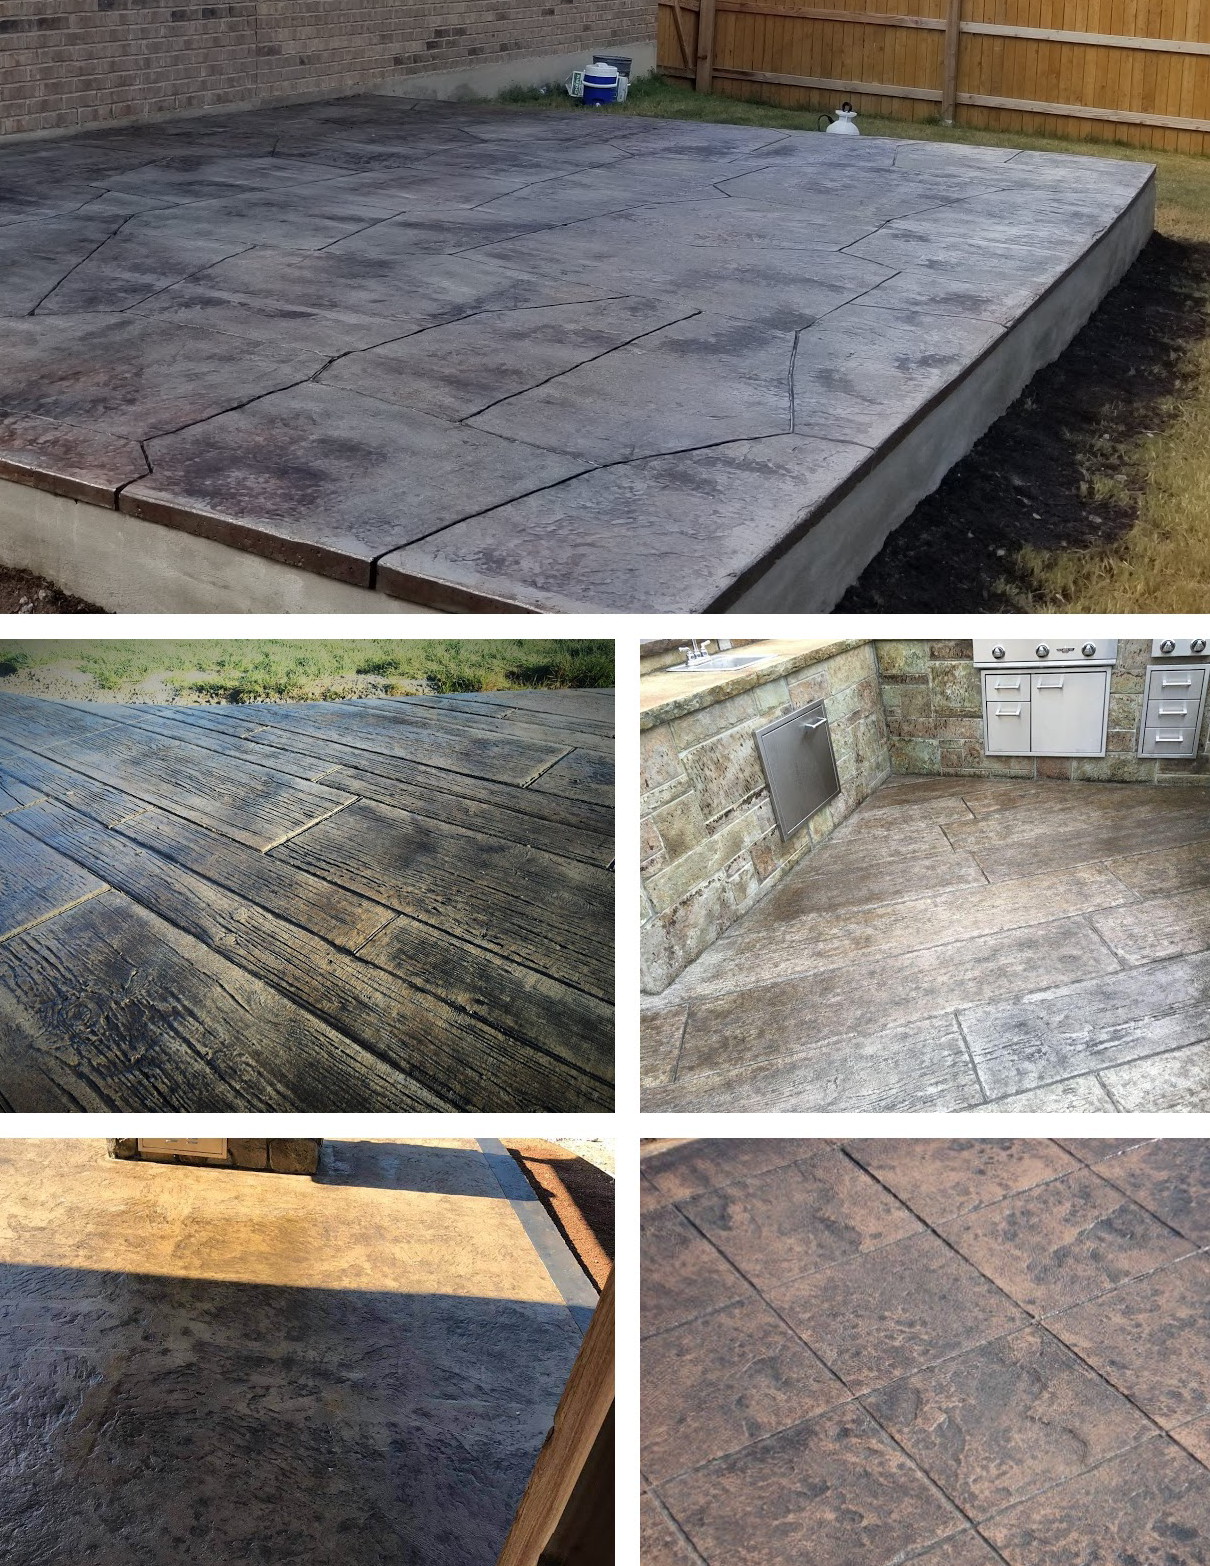
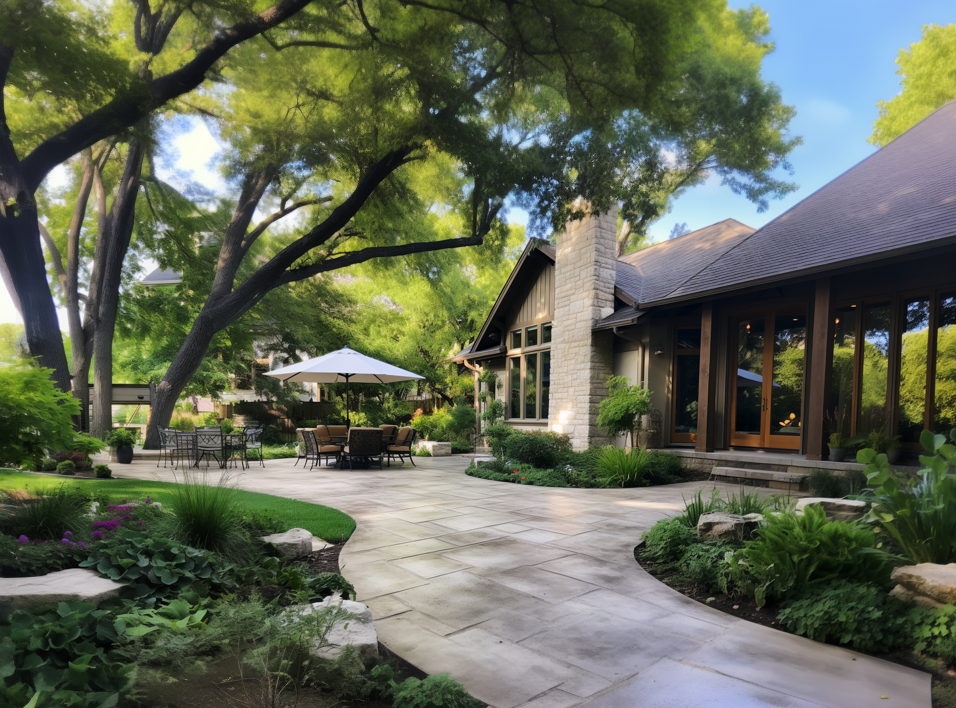
Stamped Overlay
The stamped overlay process, in addition to using integral color to achieve the base color of the patio, also uses a secondary dry powder known as a “release agent“. This release agent performs two functions. Aesthetically it adds a secondary color, usually a darker accent color to the stamp pattern that gets stuck in the indentions and grout lines of the stamp. This creates a two-tone realism to the stamp pattern that you have chosen. Functionally the release powder prevents the stamp from sticking to and pulling up the overlay as the technician works.
As with the self-leveling and broom overlays, you must first prime the surface before applying stamped overlay. Although air bubbles may disrupt the finish stamped surface if left unprimed, most stamps have sufficient texture, powder and pressure when stamping that air bubbles are hardly noticeable. The primary reason for priming prior to applying a stamped overlay is for the functional purpose of bonding the overlay to the underlying concrete.
The stamped-overlay mix is usually a pre-packaged dry powder requiring only water and liquid integral color. The overlay is mixed in a 5-gallon pail with a paddle mixer for small applications or a masonry hopper for larger applications. The liquified mix will have the consistency of pancake batter when it’s ready to be applied. The technician will use a gauge rake in order to make sure the thickness is consistent as it is applied. The stamped overlay thickness 1/4 to 3/8 inch depending on the depth of the stamp texture chosen.
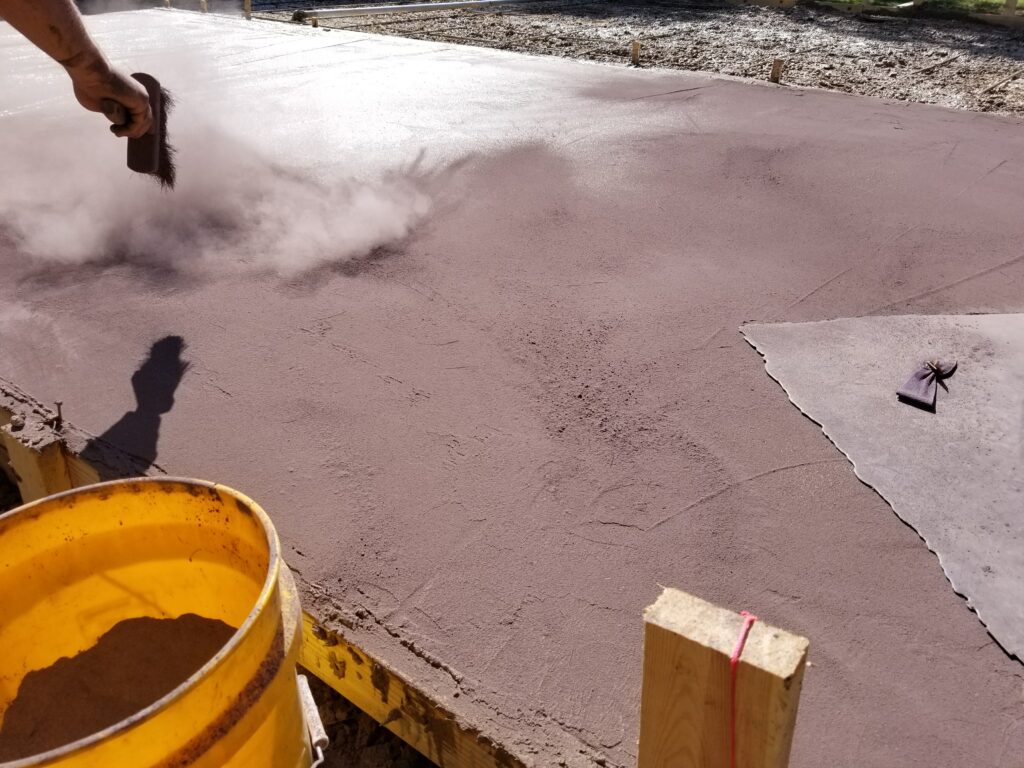
After applying the stamped overlay mix, the technician waits for it to dry partially. The mix is ready to be stamped when it is dry to the touch but the thumb can partially press in the mixture to one-half of the overall depth. At this point the crew will dust the stamps with release powder using a masonry brush, and begin the arduous process stamping the surface.
Stamped concrete overlays are a lot of work and fairly expensive, but create stunning and long-lasting decorative patterns.
Finishing, Staining and Protecting your Concrete Overlay
The final three (3) techniques that contribute to the aesthetic and protective qualities of any overlay include stain, accent stain and sealer. Stain and accent stain infuse hues and add depth, dimension and unique patterns prior to sealing. Sealer enhances color, provides protection from the fading effects of ultraviolet sun damage and from water damage.
Finishing stain, accent stain and sealer elevate the appearance and durability of your concrete overlay.
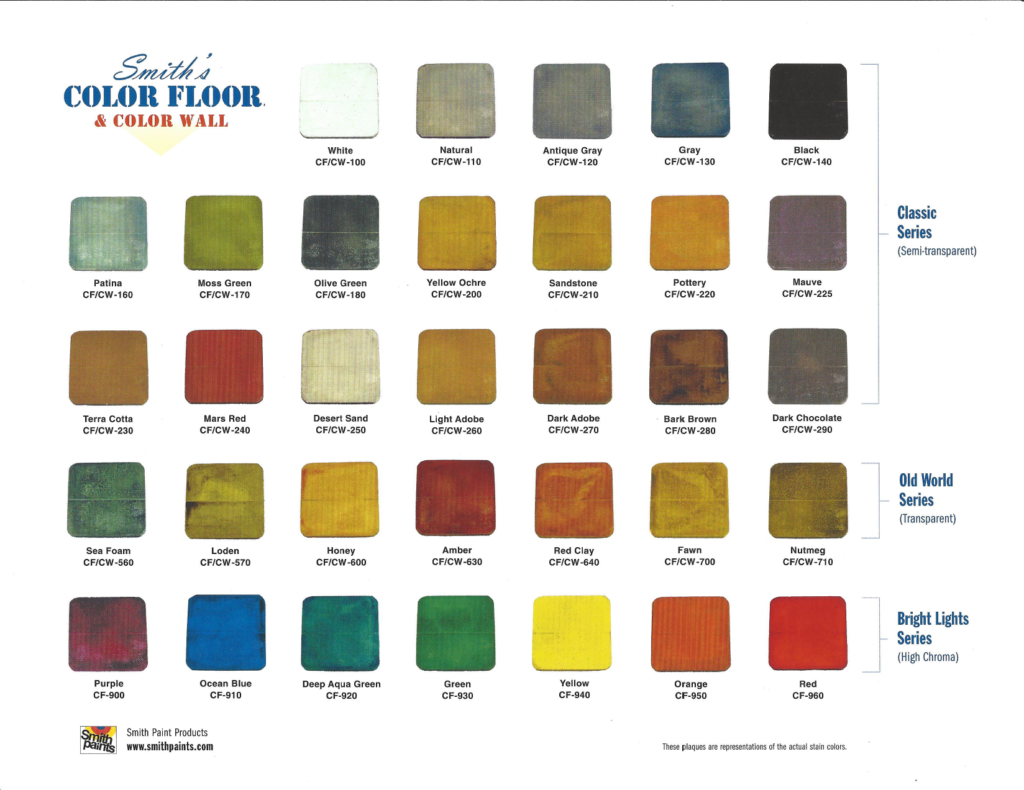
Stain
Even if no integral color was is used, stain will infuse an overlay with a deep and satisfying wash of color. We never recommend painting a patio as it always wears badly. Concrete stain outperforms painted surfaces due to its translucency and ability to penetrate the surface, enhancing the character and beauty of the overlayment. When combined with a similar integral hue and enhances with sealer, the stain can add a three-dimensional effect of depth allowing you to look into the patio surface.
Custom Accent Stain
Accent stain is used mostly for specific stamp patterns where the two-tone combination of integral hue and release powder are not enough. Accent stain adds an artistic polish to a finished patio as it is entirely applied by hand in order to create variation and interest.
Though expensive because it is applied by hand by an artist trained in the craft, accent stain can produce a wide variety of unique patio designs. These include variable board tones for wood plank stamp patterns, variable stone coloring for flagstone stamps, and our favorite: bedrock simulated hues for seamless slate stamp patterns. (Incidentally the same bedrock technique and seamless stamp overlay is used for most of our projects involving pond wall finishing.)
Patio Sealer
When working on a project many of the color choices (including integral, release, stain and accent stain) will not be evident until the very end of the project when the sealer is applied. This is because a quality sealer will deepen the tint and darken the shadow of every color used in the job. Sealer amplifies the contrast of the colors in your patio. It also adds sheen or heavy gloss depending on your preference. The sealer provides the contractor with an “ah ha!” moment where the patio literally transforms in front of the customers eyes from dusty workspace to brilliant outdoor living feature the moment it is applied!
In addition to finishing aesthetics the sealer protects the overlay from weather, spills and wear. The best sealers penetrate the masonry surface to provide long lasting protection. In addition to being outdoors and exposed to the elements, the best patios are daily-use high traffic areas of the home (often with an outdoor kitchen). Properly sealing your patio will ensure its longevity and maintain its pristine appearance.
Closing: Get Ready to Bring New Life to your Patio with Concrete Overlays!
Concrete overlays present a practical and imaginative solution to rekindle the charm of a once-lovely patio. They possess the ability to invigorate and renew your outdoor space by rejuvenating worn-out surfaces. By adhering to the steps outlined in this guide, you can infuse vitality into aging concrete surfaces, enriching both their visual appeal and functionality.
Keep in mind that each step contributes significantly to the triumph of your overlay project – from meticulous surface preparation and overlay selection to the finishing touches. Should you require optimal results, do not hesitate to seek professional advice or services.
We trust that this guide has equipped you with valuable insights and sparked inspiration for your concrete overlay undertakings. For any inquiries or assistance, don’t hesitate to reach out to our experts. Are you poised to transform your concrete surfaces? Reach out to us now and embark on your chosen overlay transformation.